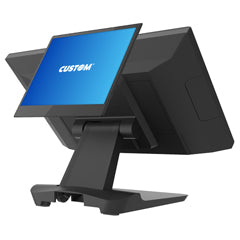
Citizen Printer Ethernet Setup
Setting up a Citizen receipt printer over Ethernet means connecting the printer to your network, finding its IP address, adding it to your POS system or computer, and confirming that receipts print correctly. Ethernet is often the best connection type for restaurants, retail stores, grocery stores, liquor stores, convenience stores, and other POS environments because it can be more stable than Bluetooth or Wi-Fi when the printer is installed at a fixed checkout counter.
This guide explains how to set up a Citizen Ethernet receipt printer for POS use, including network connection, IP address lookup, printer driver setup, static IP recommendations, test printing, and troubleshooting.
Spartan POS helps businesses choose and configure Citizen receipt printers, receipt paper, cash drawers, barcode scanners, and POS hardware. Spartan POS is an authorized dealer and supports the products it sells.
Shop Citizen Ethernet Receipt PrintersCitizen Printer Ethernet Setup: Quick Answer
To set up a Citizen receipt printer with Ethernet, connect the printer to power, plug an Ethernet cable from the printer into your router or network switch, load receipt paper, turn the printer on, print or locate the printer’s network IP address, then add that IP address to your POS software or computer printer settings.
For the most reliable POS setup, many businesses use a static IP address or DHCP reservation so the printer keeps the same address on the network. If the IP address changes, your POS system may stop printing until the printer is reconfigured.
Compatibility depends on your POS software, operating system, connection type, drivers, accessories, and configuration. Confirm compatibility before ordering or changing printer settings.
Before You Start
Before setting up a Citizen Ethernet printer, make sure you have the correct hardware and information ready.
- Citizen receipt printer with Ethernet interface
- Compatible power supply
- Ethernet cable
- Router, network switch, or active network port
- Compatible receipt paper
- POS software login or admin access
- Computer, tablet, or POS terminal connected to the same network
- Citizen printer driver or utility, if required by your setup
- Printer model number and interface type
If you need receipt paper for your printer, browse receipt paper rolls. If you are building a full checkout station, you may also need a compatible cash drawer, barcode scanner, and receipt printer.
Step 1: Confirm the Printer Has Ethernet
Citizen receipt printers can be sold with different interface options, including USB, serial, Bluetooth, Wi-Fi, and Ethernet depending on the model and configuration. Before starting setup, confirm that your printer has an Ethernet port installed.
An Ethernet port looks like a network cable port and is usually located on the back or underside of the printer interface area. If the printer only has USB, serial, or another interface, it will not connect directly to your network over Ethernet without the correct interface hardware.
Step 2: Connect the Citizen Printer to Power and Network
- Place the printer near your POS station, router, or network switch.
- Connect the power supply to the printer.
- Plug the power cord into a working outlet or surge protector.
- Connect one end of the Ethernet cable to the printer’s Ethernet port.
- Connect the other end of the Ethernet cable to your router, network switch, or active network wall port.
- Load the correct thermal receipt paper into the printer.
- Turn the printer on.
For the best reliability, avoid loose Ethernet cables, damaged network ports, overloaded power strips, or network switches that are powered off during business hours.
Step 3: Make Sure the Printer and POS Are on the Same Network
Your POS terminal, computer, tablet, or server usually needs to be on the same local network as the Citizen Ethernet printer. If the printer is connected to one router and the POS terminal is connected to a different guest network, mobile hotspot, VLAN, or isolated Wi-Fi network, the POS system may not be able to find or print to the printer.
Common network problems include:
- Printer connected to the router but POS terminal connected to guest Wi-Fi
- Tablet connected to a hotspot instead of the store network
- Printer connected to a network switch that is not connected to the router
- Firewall rules blocking local network printing
- Router isolation settings blocking devices from seeing each other
- Printer IP address changing after the router restarts
Step 4: Find the Citizen Printer IP Address
The IP address is the network address your POS system uses to send print jobs to the Citizen printer. You may be able to find the IP address by printing a network status sheet, checking your router’s connected devices list, or using a Citizen printer utility.
Option 1: Print a Network Status Sheet
Many Citizen Ethernet printer setups allow you to print a network or self-test sheet that includes the current IP address. The exact button sequence can vary by printer model, so check the user manual for your specific Citizen printer before holding or pressing buttons.
Look for information such as:
- IP Address
- Subnet Mask
- Gateway
- MAC Address
- DHCP status
- Interface type
Option 2: Use a Citizen Printer Utility
Citizen printer utilities may help locate or configure printers on the local network. This is useful when the printer is powered on, connected to Ethernet, and connected to the same network as your computer.
Use official Citizen drivers and tools for your exact printer model whenever possible. Avoid random third-party driver downloads, especially on POS systems used for payment, inventory, or business operations.
Option 3: Check the Router
You may also be able to find the printer in your router’s connected devices list. Look for a Citizen printer name, printer hostname, or MAC address that matches the printer’s network information.
Step 5: Decide Between DHCP and Static IP
Many printers receive an IP address automatically from the router using DHCP. This can work for initial setup, but it may create problems later if the router assigns a different IP address after a restart, power outage, network change, or lease renewal.
For most business POS environments, a static IP address or DHCP reservation is recommended. This helps the Citizen printer keep the same network address so the POS system does not lose connection to the printer.
| IP Setup | Best For | Considerations |
|---|---|---|
| DHCP | Quick setup and temporary testing | Printer IP may change, which can break POS printing |
| Static IP | Permanent POS installations | Requires careful network setup to avoid duplicate IP addresses |
| DHCP reservation | Most business networks | Router assigns the same IP to the printer automatically |
If you are not comfortable changing network settings, ask your IT provider, POS provider, or network administrator to assign the printer a reserved IP address.
Step 6: Add the Citizen Printer to Your POS Software
After you find the printer’s IP address, add the printer inside your POS software. The exact steps depend on your POS system, but most Ethernet printer setups require the printer model, printer type, IP address, port setting, and receipt or kitchen printer assignment.
Your POS software may ask for:
- Printer name
- Printer model
- Printer type
- Connection type
- IP address
- Port number
- Receipt printer, kitchen printer, or order printer role
- Cash drawer kick setting, if using a connected cash drawer
If your POS software has a supported printer list, confirm the exact Citizen model before ordering or configuring the printer. Some POS systems support only specific Citizen models, connection types, firmware versions, or printer emulation settings.
Step 7: Install the Citizen Driver if Needed
Some POS systems print directly to the printer over the network. Others require a printer driver on a Windows computer, POS terminal, or server. If your setup requires a driver, download the correct driver for your Citizen printer model and operating system from Citizen’s official support resources.
When installing a Citizen Ethernet printer on a computer, you may need to create or select a TCP/IP printer port using the printer’s IP address. After installation, print a Windows test page or POS test receipt to confirm communication.
Step 8: Test Print from the POS System
Once the printer is added, run a test print from the POS software. Test both a simple receipt and any role-specific printing your business uses.
- Print a test receipt
- Run a small sale or training transaction
- Test kitchen tickets if used in a restaurant
- Test online order tickets if applicable
- Test cash drawer opening if the drawer connects through the printer
- Confirm receipt width, logo, font size, and cut settings
If the printer prints from the computer but not from the POS software, the issue may be inside the POS printer configuration. If the printer does not print from either place, the issue may be network, driver, port, power, or printer configuration related.
Citizen Ethernet Printer Troubleshooting
| Problem | Likely Cause | What to Check |
|---|---|---|
| Printer does not appear on the network | Network cable, switch, router, or printer interface issue | Check Ethernet cable, router port, switch power, and printer network status |
| POS cannot print to printer | Wrong IP address or POS printer configuration | Confirm printer IP, POS printer settings, printer role, and connection type |
| Printer worked yesterday but not today | IP address changed | Use a static IP or DHCP reservation so the address stays the same |
| Printer prints from driver but not POS | POS software configuration issue | Check printer assignment, receipt template, port, and POS-supported model list |
| Cash drawer does not open | Wrong drawer cable, wrong printer port, or POS drawer setting | Confirm cash drawer cable, printer kick port, and POS cash drawer settings |
| Receipts are too wide, too narrow, or cut off | Wrong paper width, driver setting, or POS template | Check paper size, printer driver preferences, and receipt layout settings |
| Printer prints random characters | Wrong driver, emulation, or port setting | Confirm printer model, driver, command mode, and POS compatibility |
Best Practices for Citizen Ethernet Printer Setup
- Use a wired Ethernet connection for fixed checkout and kitchen printer stations when possible.
- Assign a static IP address or DHCP reservation to prevent printing failures caused by IP changes.
- Label the printer with its IP address, printer role, and location.
- Keep the printer, POS terminal, and router on the same local network.
- Use a surge protector or battery backup for critical POS hardware.
- Keep spare receipt paper near the printer.
- Test receipt printing before opening, before events, and after network changes.
- Use official drivers, manuals, and configuration tools for your exact Citizen printer model.
- Document the printer model, IP address, interface type, and POS configuration for future troubleshooting.
Citizen Printer Ethernet Setup for Restaurants
Restaurants often use Ethernet receipt printers because they may need reliable printing at multiple stations, such as the front counter, bar, kitchen, expo station, or pickup area. Ethernet can be a strong option when printers need to be shared across a local network or assigned to specific order types.
If you are using a Citizen printer as a kitchen printer, confirm whether thermal printing is appropriate for the environment. In hot, humid, greasy, or steam-heavy prep areas, an impact printer may be a better choice than a thermal receipt printer. Learn more in Spartan POS’s guide to restaurant kitchen printer features.
Citizen Printer Ethernet Setup for Retail
Retail stores often use Citizen Ethernet receipt printers at checkout counters where the printer stays connected to one POS station or shared network. Ethernet is useful when the store wants a stable printer connection, consistent receipt printing, and a clean checkout setup.
A complete retail checkout setup may also include a cash drawer, barcode scanner, receipt paper, and compatible POS terminal.
Recommended POS Hardware for Citizen Printer Setups
A Citizen Ethernet printer may be part of a larger POS hardware setup. Depending on your business, you may need:
- Receipt printers for customer receipts and order printing
- Receipt paper for compatible Citizen thermal printers
- Cash drawers for secure cash handling
- Barcode scanners for checkout, inventory, and product lookup
- Label printers for barcode labels, product labels, and shelf labels
- POS systems for retail, restaurant, grocery, liquor, convenience, and service businesses
When to Contact Support
Contact your POS provider, IT provider, or Spartan POS if the printer is connected to Ethernet but does not print, the IP address keeps changing, your POS software does not recognize the printer, cash drawer kicking does not work, or you are unsure which Citizen printer model is compatible with your setup.
Before contacting support, gather the following information:
- Citizen printer model number
- Printer interface type
- Current printer IP address
- POS software name and version
- Operating system or POS terminal model
- Connection type
- Router or network setup details
- Any error messages from the POS software
Why Buy Citizen Printers from Spartan POS?
Spartan POS helps businesses choose POS printers based on real checkout and order printing workflows. For Citizen Ethernet printer setups, that means checking the printer model, connection type, receipt paper, cash drawer compatibility, POS software requirements, and network environment before installation.
- Authorized dealer support for POS hardware
- Help choosing receipt printers for retail, restaurant, grocery, liquor, convenience, and service businesses
- Support for receipt printers, receipt paper, cash drawers, barcode scanners, and POS accessories
- Practical guidance before ordering to reduce compatibility problems
- POS hardware support from a team that understands real business workflows
Frequently Asked Questions
How do I set up a Citizen receipt printer with Ethernet?
Connect the Citizen printer to power, plug an Ethernet cable into the printer and router or network switch, load receipt paper, turn the printer on, find the printer IP address, then add that IP address inside your POS software or computer printer settings.
How do I find the IP address of a Citizen printer?
You can usually find the Citizen printer IP address by printing a network status sheet, checking the router’s connected devices list, or using a Citizen printer utility on a computer connected to the same local network.
Should my Citizen Ethernet printer use a static IP?
For most business POS setups, yes. A static IP address or DHCP reservation helps keep the printer address from changing. If the printer IP changes, the POS system may stop printing until the printer settings are updated.
Why is my Citizen Ethernet printer not printing?
Common causes include the wrong IP address, disconnected Ethernet cable, printer and POS device on different networks, changed router settings, incorrect POS printer setup, missing driver, wrong printer model, or incompatible connection settings.
Can I connect a cash drawer to a Citizen Ethernet printer?
Many POS cash drawers connect through the receipt printer’s drawer kick port, but compatibility depends on the printer model, cash drawer cable, POS software, and configuration. Confirm compatibility before ordering.
Is Ethernet better than Bluetooth for a receipt printer?
Ethernet is often better for fixed POS stations because it can provide a stable wired network connection. Bluetooth may be useful for tablets or mobile setups, but compatibility and reliability depend on the POS software, device, distance, and environment.
Can Spartan POS help with Citizen printer setup?
Yes. Spartan POS can help review your Citizen printer model, POS software, connection type, receipt paper needs, cash drawer requirements, and network setup before you order or configure your hardware. Contact Spartan POS for help choosing the right setup.
Bottom Line
A Citizen Ethernet printer setup works best when the printer is connected to the same local network as the POS system, assigned a stable IP address, configured correctly inside the POS software, and tested before the business opens. For many retail and restaurant environments, Ethernet is a strong choice because it supports reliable fixed-station receipt printing.
Start with a compatible receipt printer, stock the correct receipt paper, confirm your POS software requirements, and use a static IP or DHCP reservation for the most reliable Ethernet printing setup. Spartan POS can also help with cash drawers, barcode scanners, label printers, and complete POS hardware planning.